Table of Contents
On the left side of the screen, we have a listing window, which displays the geofence details in one place.
To view the geofence tab, go to Listing Panel > Geofence tab.
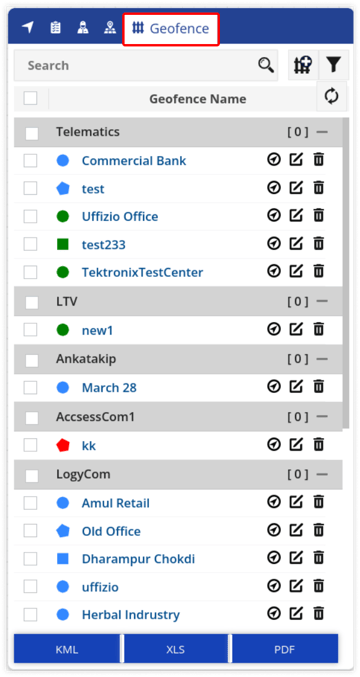
It consists of the following features and details:
Search/Add Geofence #
From here a user can perform actions on the geofences.
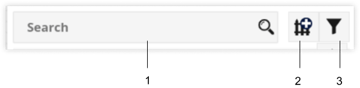
Below given are the actions that can be performed:
- Search Box: Using search box, user can easily search the specific geofences.
- Add Geofence: By clicking on Add Geofence, user can add geofence directly from the Live Tracking Screen.
Learn more about geofence configuration. - Filter: User can filter geofence information on the basis of geofence group or category using the Filter option.
Geofence Information #
All the geofence information can be viewed here in one place.
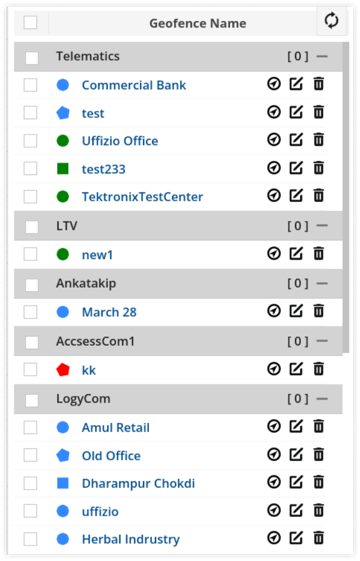
Following is the type of information that can be viewed in the geofence information list:
- Select/Unselect all geofences: By clicking on the checkbox, a user can select or unselect all the geofences at once.
- Geofence Shape:
 | Polygon |
.png?width=67&height=67&name=square%20(1).png) | Square |
 | Circle |
- Geofence Navigator: By clicking on the navigator icon, the list of vehicles that are in the selected geofence, along with their vehicle status is displayed.
- Edit Geofence: User can edit the geofence details by clicking on the Edit icon.
- Delete Geofence: User can delete the geofence by clicking on the the Delete icon.
Download Geofence Information #
All the geofence information can be downloaded in KML, XLS format or in PDF format.


